Editing Documents and Images
You may edit documents and images which have been added, or loaded, via the Documents window in Incumbents | Skills, Training, Property or Events.
- Open the appropriate Position | Incumbent and then the Skills/Training/Property/ Events item.
- Go to the Documents tab and select the document (or image).
- Either double click the document/image name in the list, or select it and click Edit.
This will open the Documents window.
Details
If you have selected a document, this tab will display all the information associated with the document (as specified when it was originally attached or loaded).
Image
If you selected an image, it will be displayed here.
Publish
Using the Publish tab, you can make the selected document or image available to users in HR3people:

- Tick the HR3kiosk check box (note that this will also apply to HR3people).
- If necessary, use the drop-down arrow next to Security Level to select the appropriate level.
Each person who logs in to HR3kiosk has an associated Security level, as specified by the system administrator. Security levels range from 0 to 9. If a user is Security level 5, they will be able to see items at Security level 5 and below. Therefore, if you apply Security level 5 to an image, any user with Security level 5 or above will be able to view the image.
Content
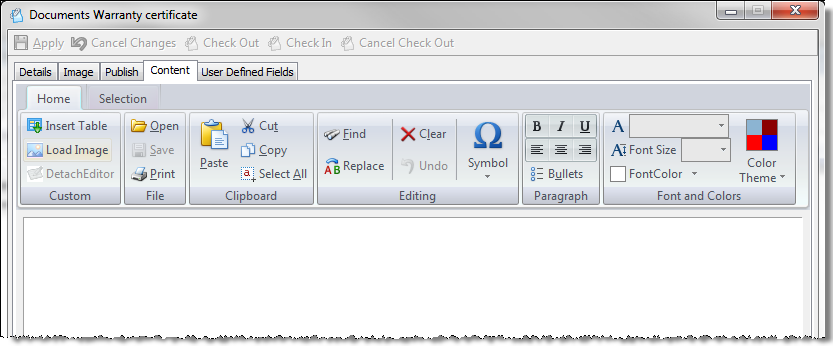
This displays a blank notes area with an Editor ribbon:

The buttons/functions on this ribbon are similar to those found in Microsoft Word, except Load Image (which allows you to add photos directly to the content). Note also that Open allows you to open an RTF format file and save that as the note for the property.
There are five sections on the Home tab of the ribbon, and another section on the Selection tab within Content. These various sections allow you to add or view the details of the attached notes for the property, images, information on publishing, and UDFs.
Editing a Loaded Document - Check Out
To make changes to a document when it has been loaded, rather than attached, you will need to use the Check Out function:

This function ensures that only one person is editing the document at one time. After that person has reviewed the document they then Check In the document to make it available to others. (If they forget to check the document back in, other users may use Cancel Check Out.) When you check out a document, by default it places it in a localFor example, a location on that person's PC or laptop. location to make it a 'local' copy.
- Locate the document and click Check Out
- In the Check Out window, the To field shows the default file locationThis location is specified in Security | System Preferences | Settings window, the Paths tab and the Work folder field. These paths are set up as part of the system implementation process. where the checked out document will be saved. Generally this will not need to be changed, however:
- If you will be making changes to the document, and want these changes to be made to the original document, you need to consider where the original document is located.
- If it is in a network location and you don't have access to this, you may choose to save the checked out copy to a local location (e.g. your Desktop) and make the changes. You will then need to replace the original document with this local copy as soon as possible.
- Alternatively, if possible, save the file with the same name and in the same location as the original (i.e. to overwrite it) and make the changes.
Whichever method you choose, once you have updated the document, you will need to upload the new version to HR3people.
Check In
Once you have edited the checked out document, you will need to check it back in.
- Close the document and click on Check In (An error message will be displayed if you have not closed the document.)
- Ensure the From field displays the correct file and location
- Ensure the Remove local copy box remains ticked (see note to follow)
- Click OK
Note: Remove local copy is for advanced users only and, unless you are familiar with this process, you are advised not to use it if you want to ensure that you maintain versioning control. If you remove the tick you will have two copies of the file - this number may accumulate if you check the document out and in at a later stage.
